How to use V3KTR
This is the shape of the app rather than a manual — five ideas and a tour of the screen. V3KTR is meant to be poked at, and almost nothing in it is destructive, so the fastest way through is to open an image and start stacking things. Read this if something isn’t behaving the way you expected.
The screen
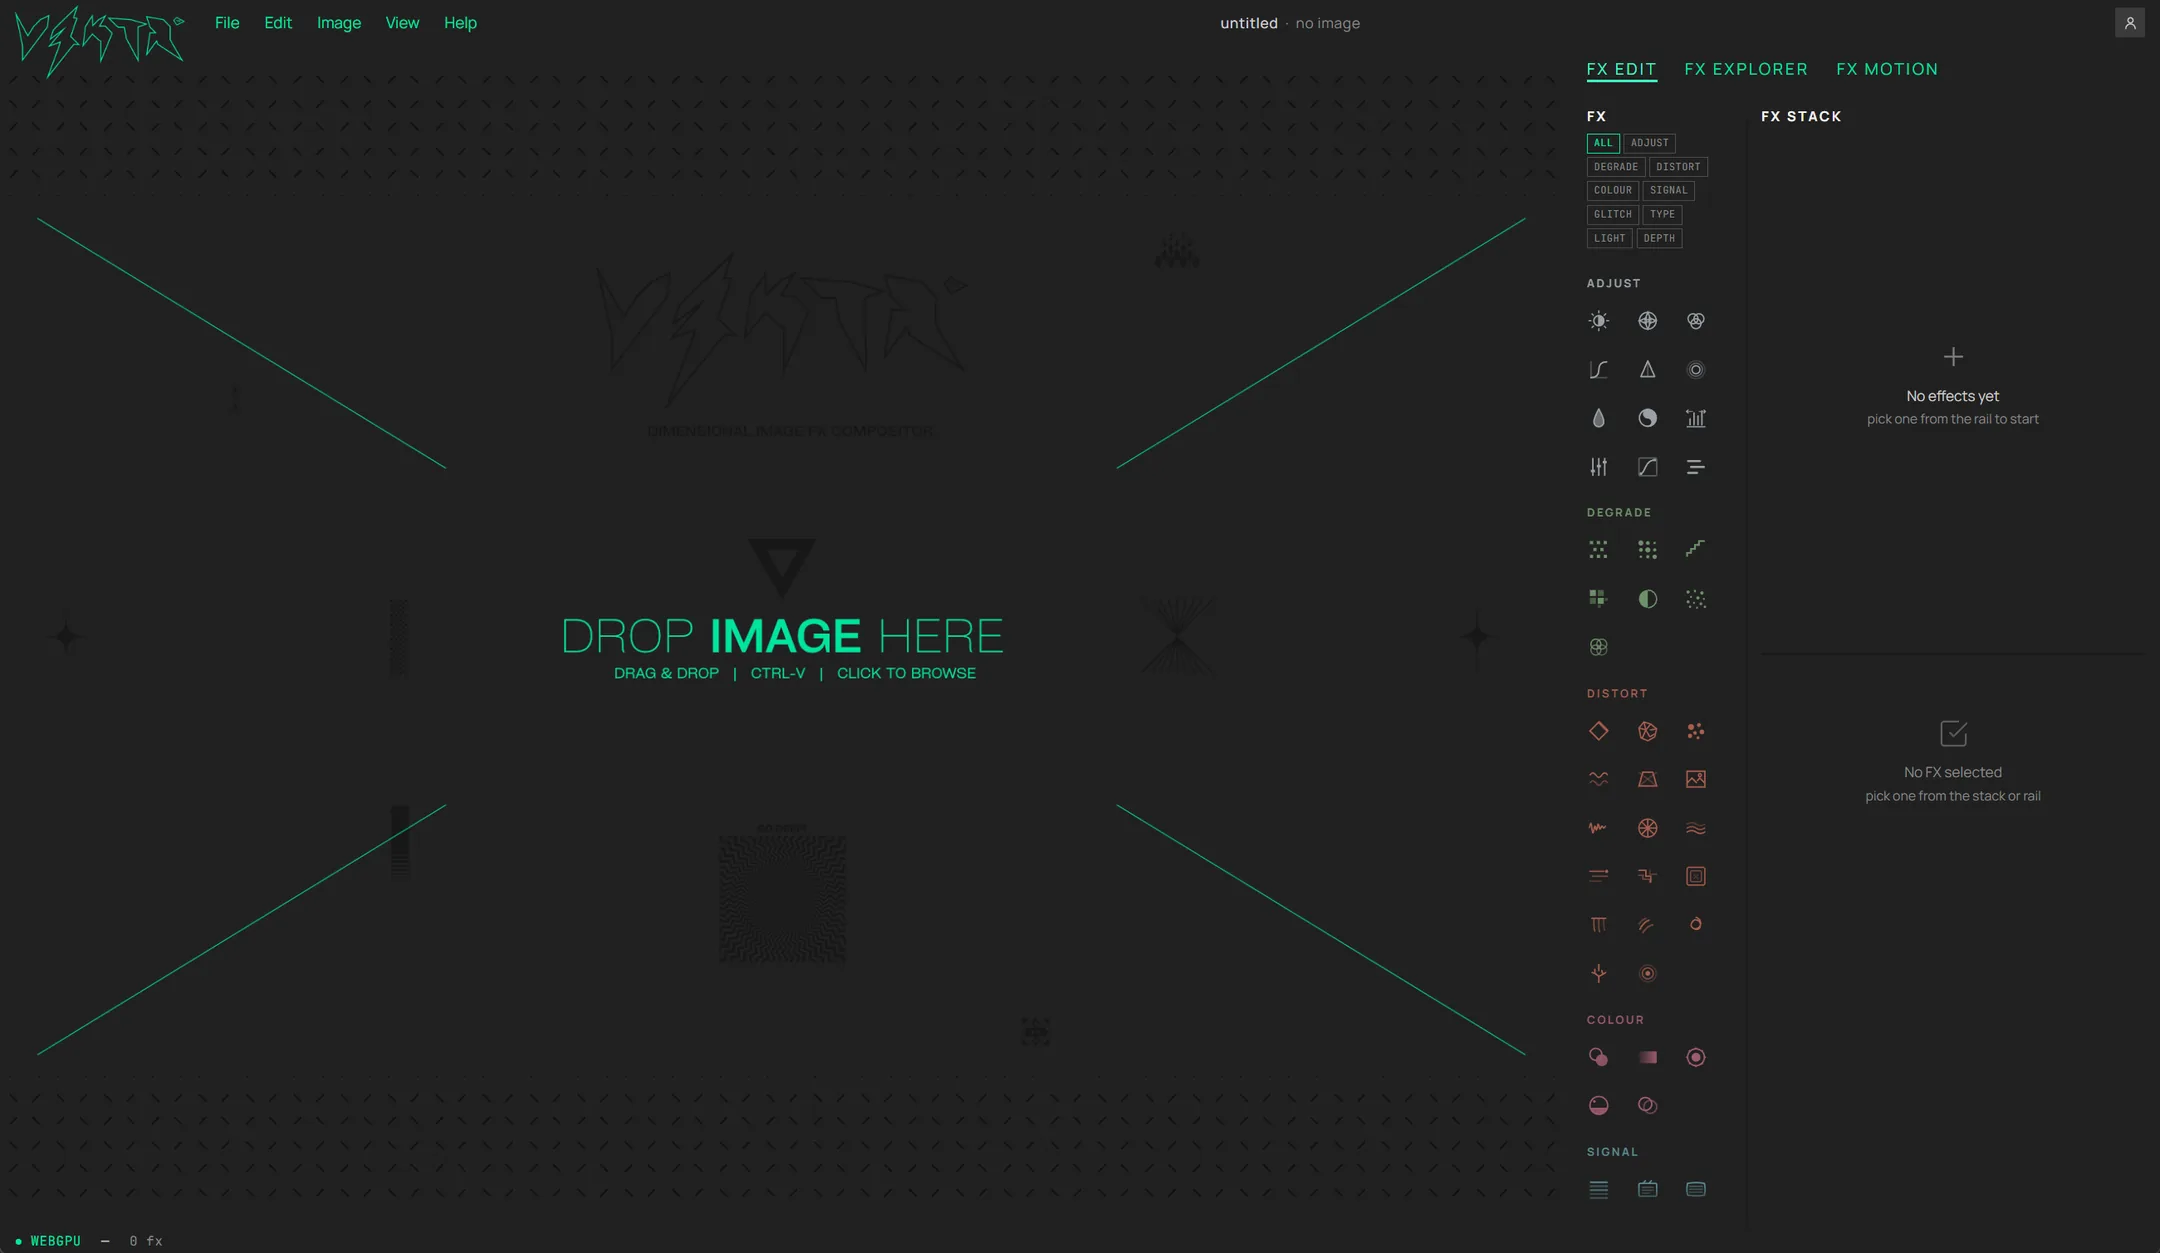
That empty canvas above is the whole of the setup. No project to create, no file to name, nothing to install — drop an image on it or paste one in, and you’re working.
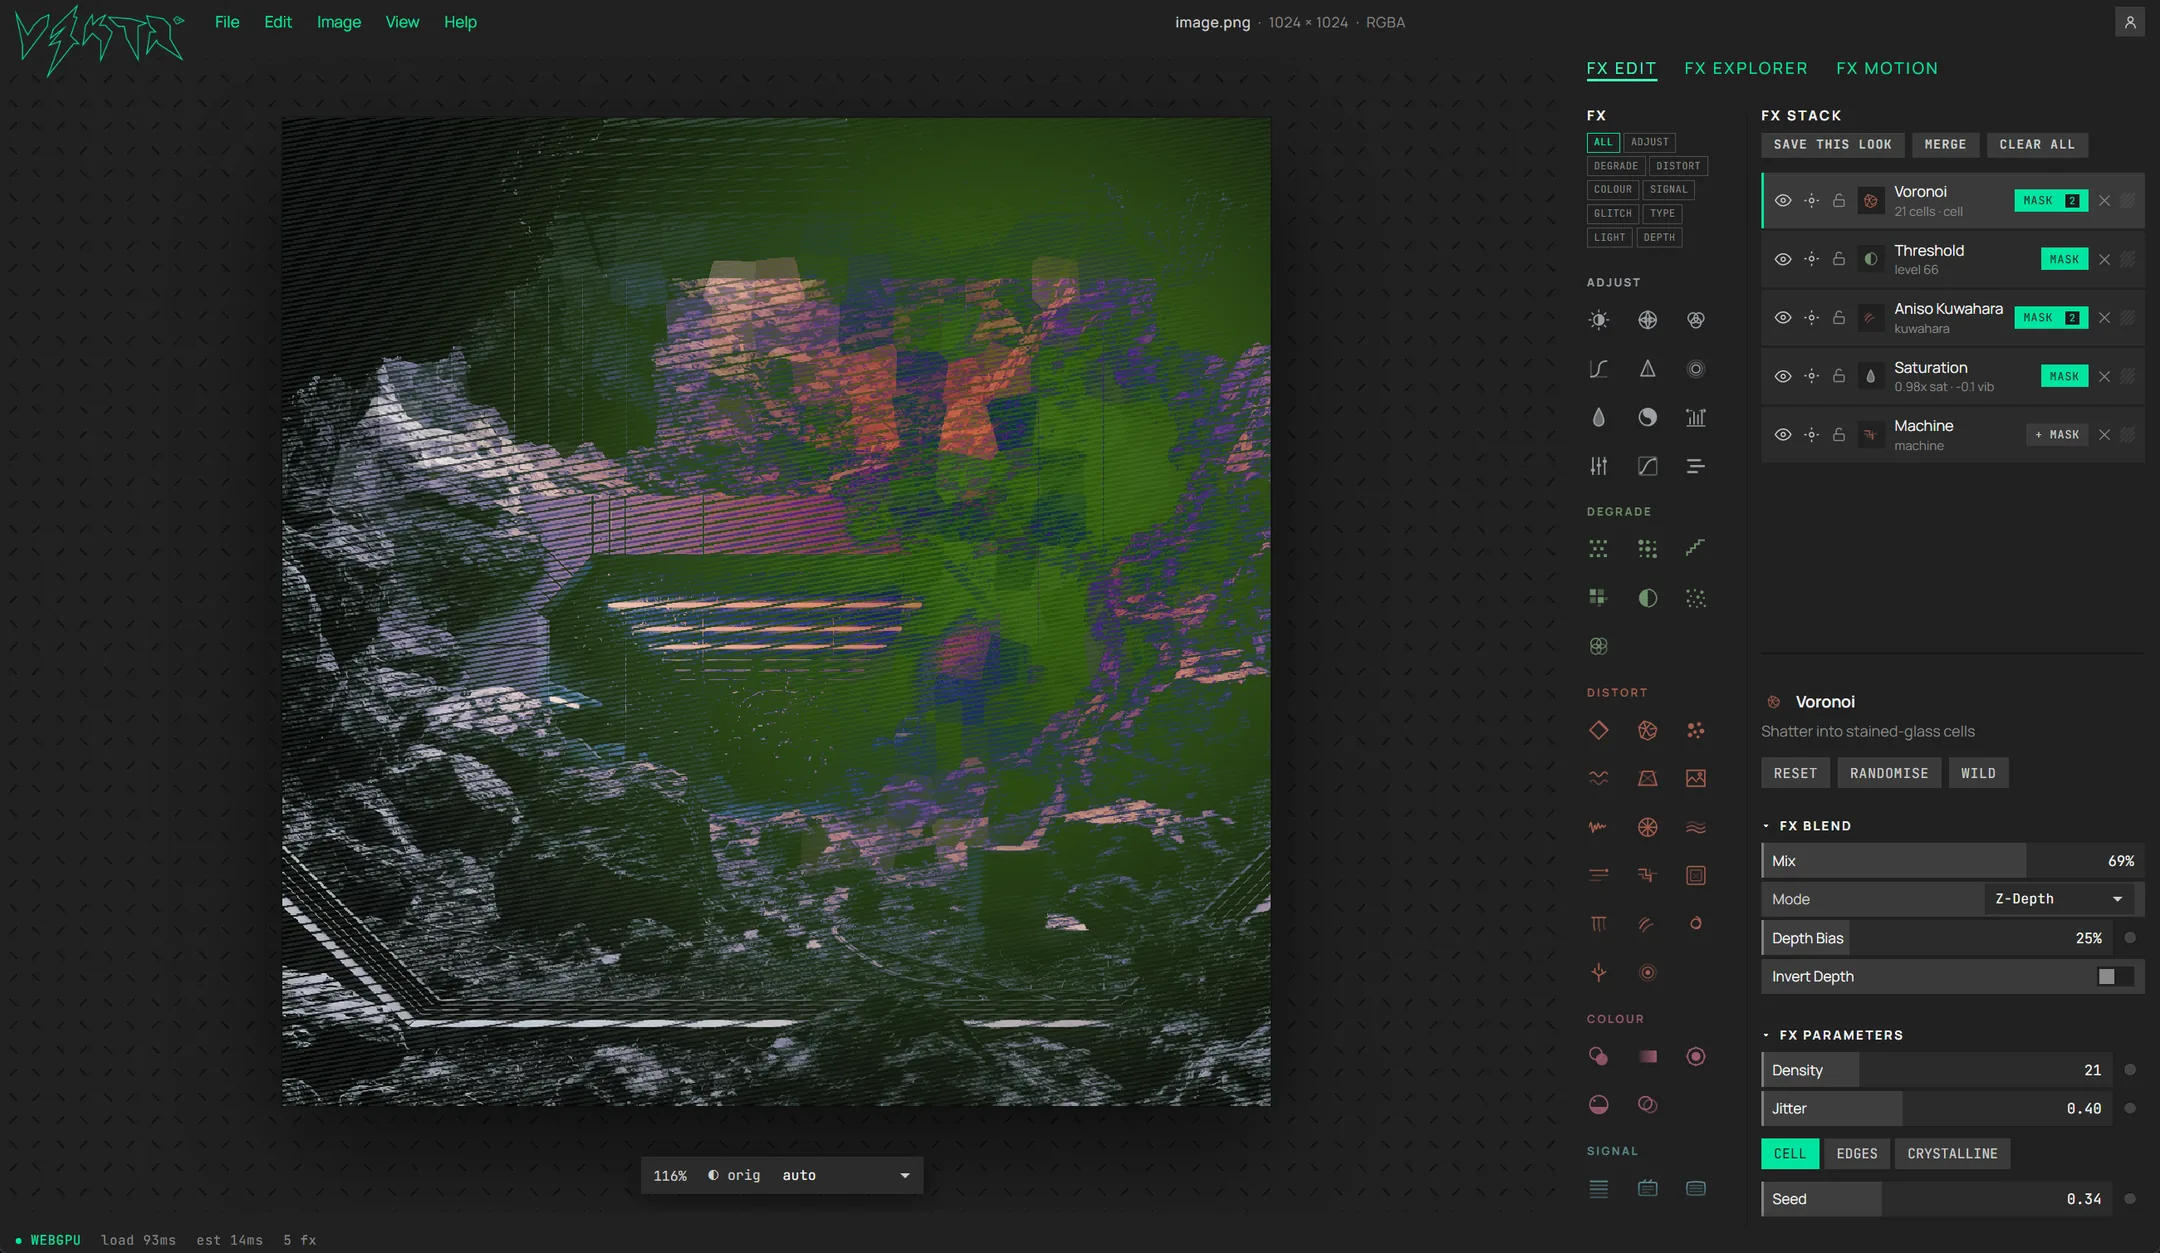
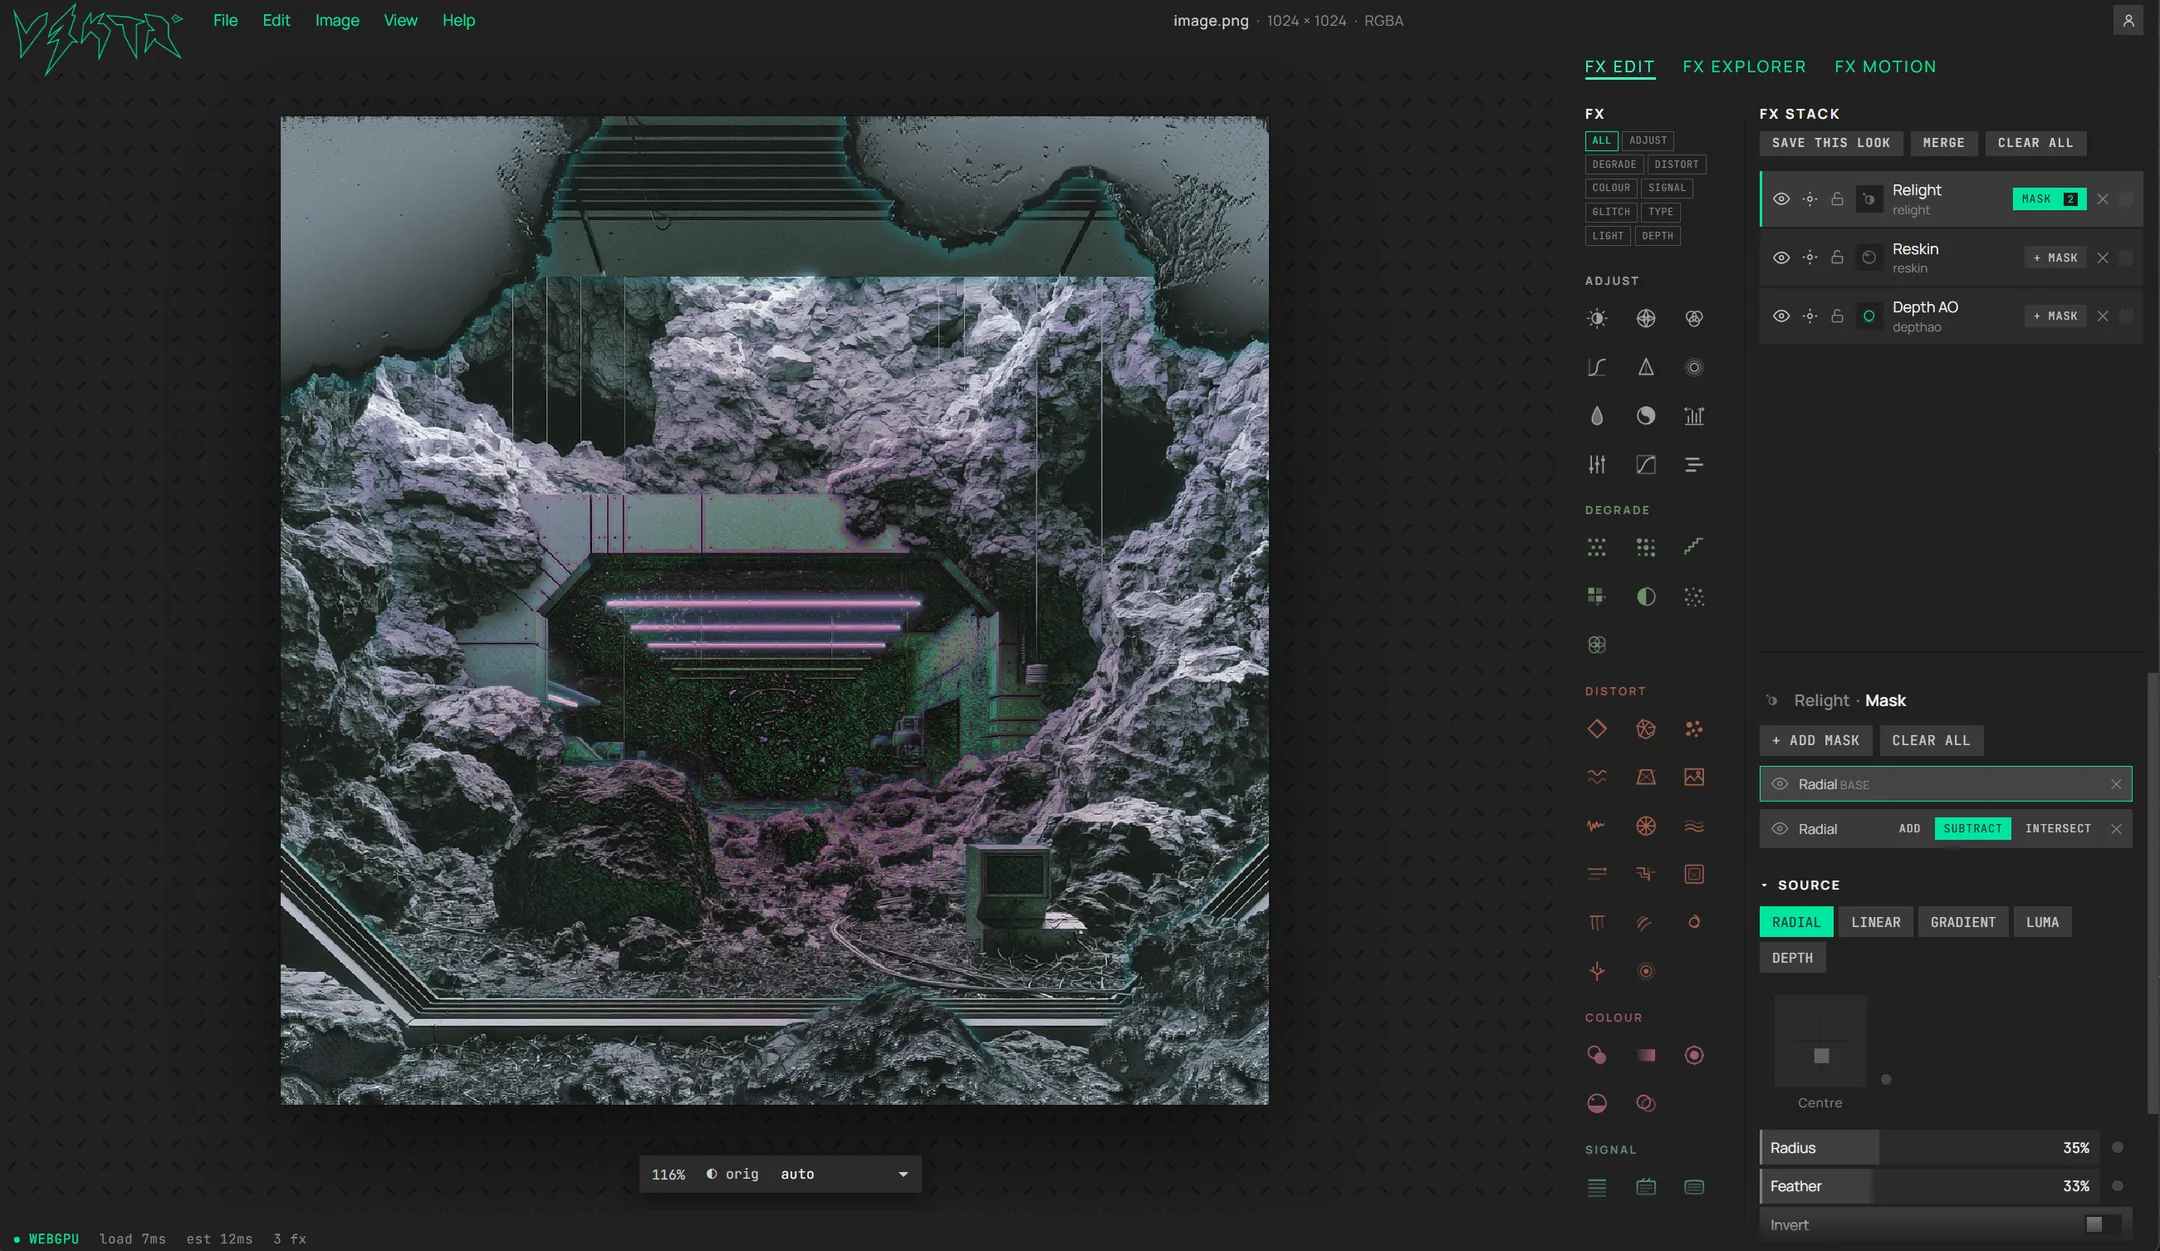
Here it is working, which is what you’ll normally be looking at. One work area, the palette on one side, your stack on the other, and the controls for whichever layer you’ve selected underneath it. The arrangement is the same in all three workspaces, so once you can read this screen you can read the others.
The controls under the canvas
Bottom-left, easy to miss, and one of them will bite you:
- fit — zoom. Double-click the canvas to reset it.
- ◐ orig — hold it to see the original underneath. Holding
\does the same thing, which is easier while you’re working. - Render scale — lower is faster and safer on big images. Copy and export capture exactly what you see, so pick Full before you export. If you export while a reduced scale is on, that reduced render is what you get.
Getting images in and out
Simple enough to be worth stating as a workflow rather than two shortcuts: paste an image straight in, work on it, copy the result out. The app accepts a paste anywhere on the page (or a file dropped on the canvas), and ⌘C / Ctrl+C puts the finished frame on your clipboard, ready for whatever you’re pasting it into. If motion is playing it freezes on the frame you’re looking at, so you copy what you saw.
Same caveat as above: the copy is taken at the current render scale.
Three workspaces
- FX Edit — build. The rail is the effect palette, the FX Stack is what you’ve added, and Parameters are the controls for whichever layer is selected.
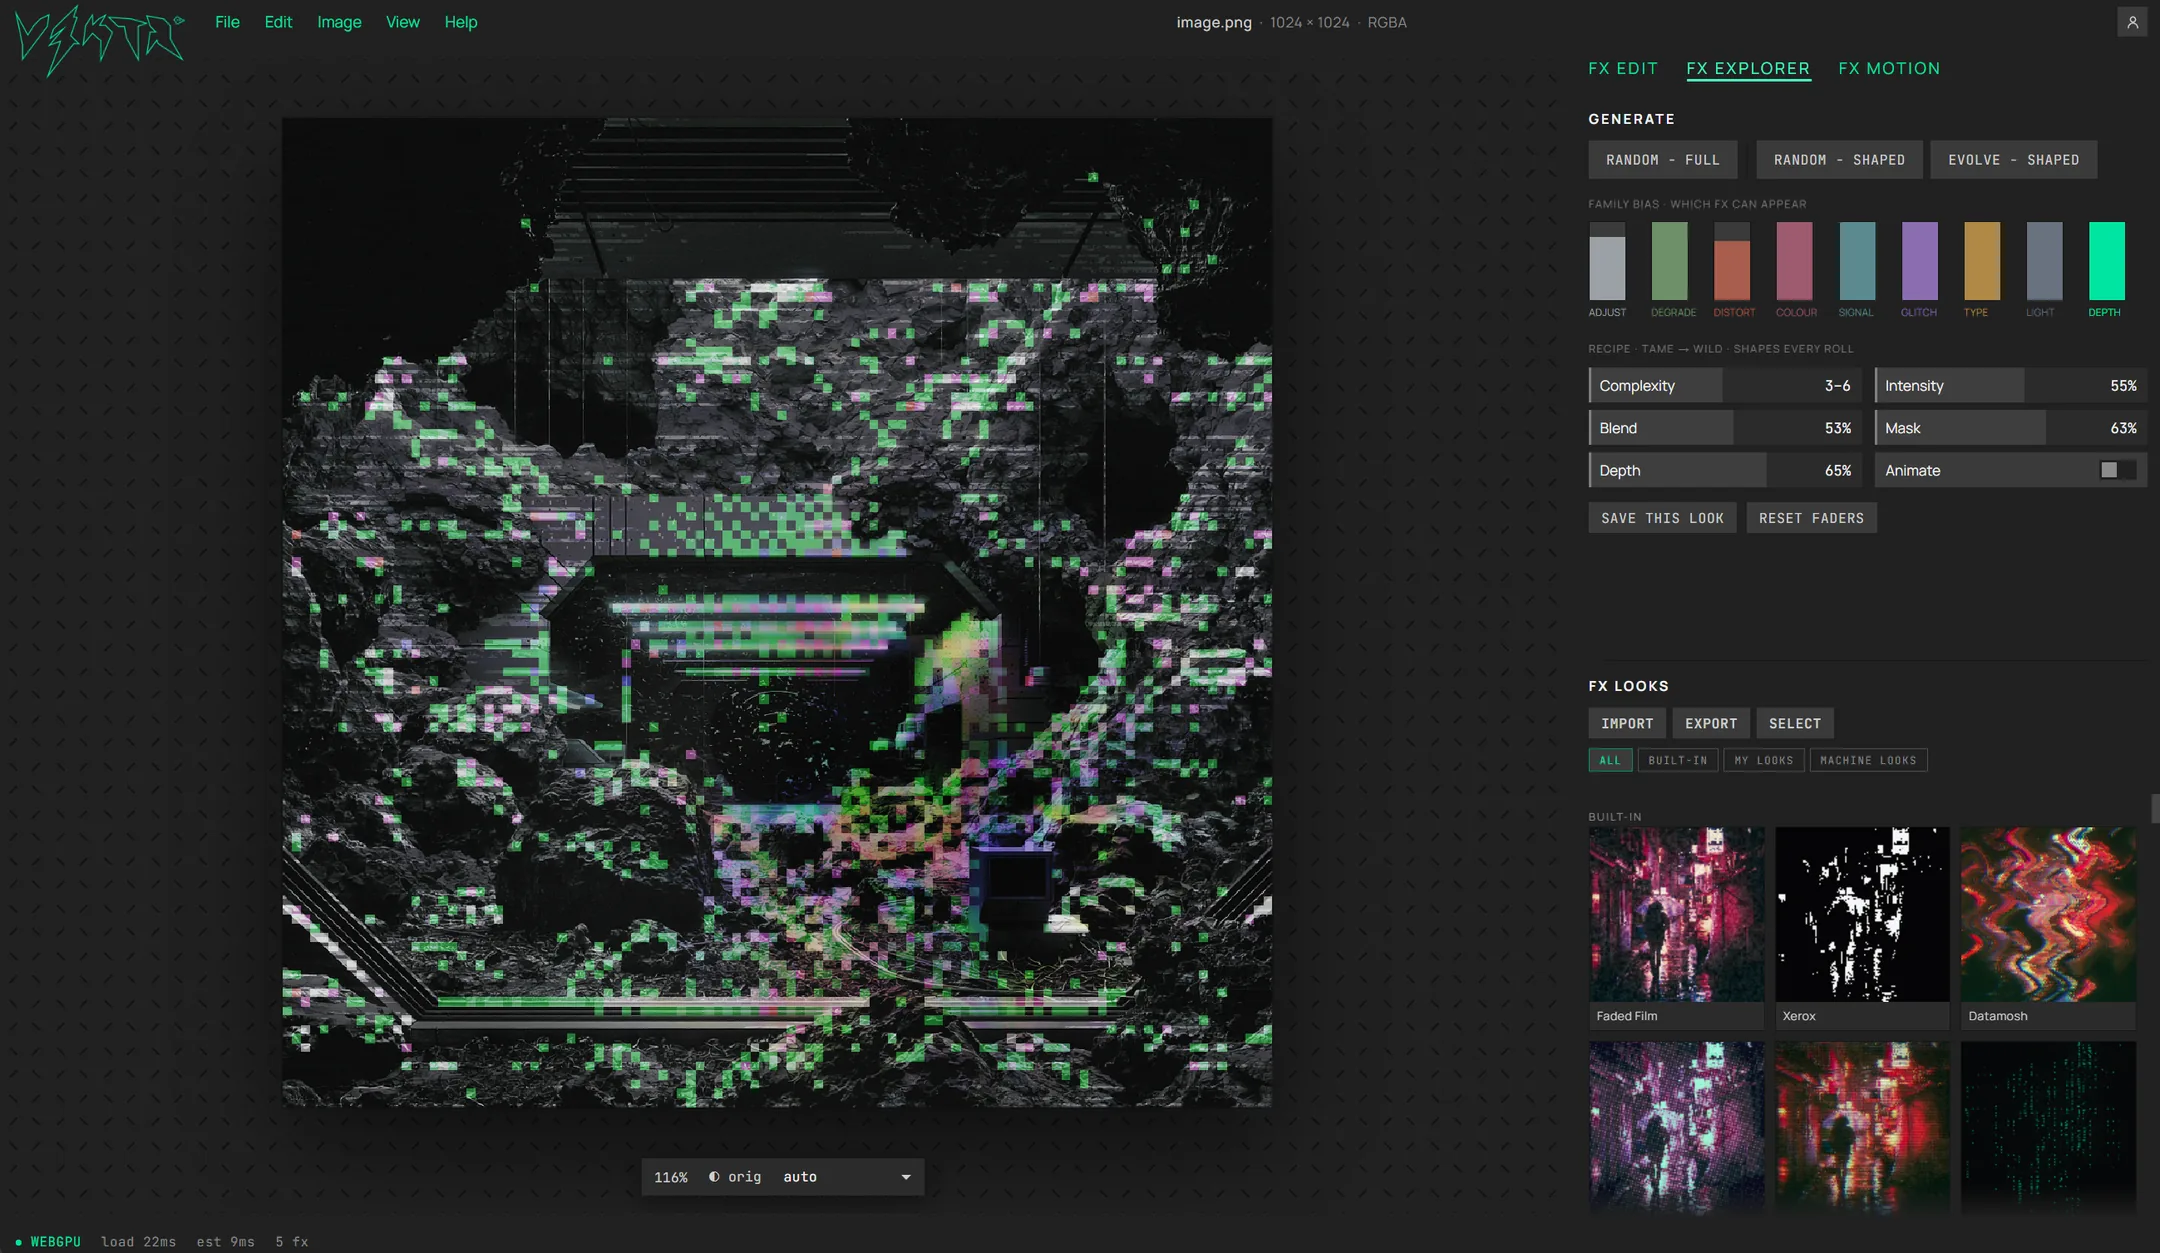
- FX Explorer — generate and browse. Random and Evolve build stacks for you; the Looks gallery keeps the ones worth having.
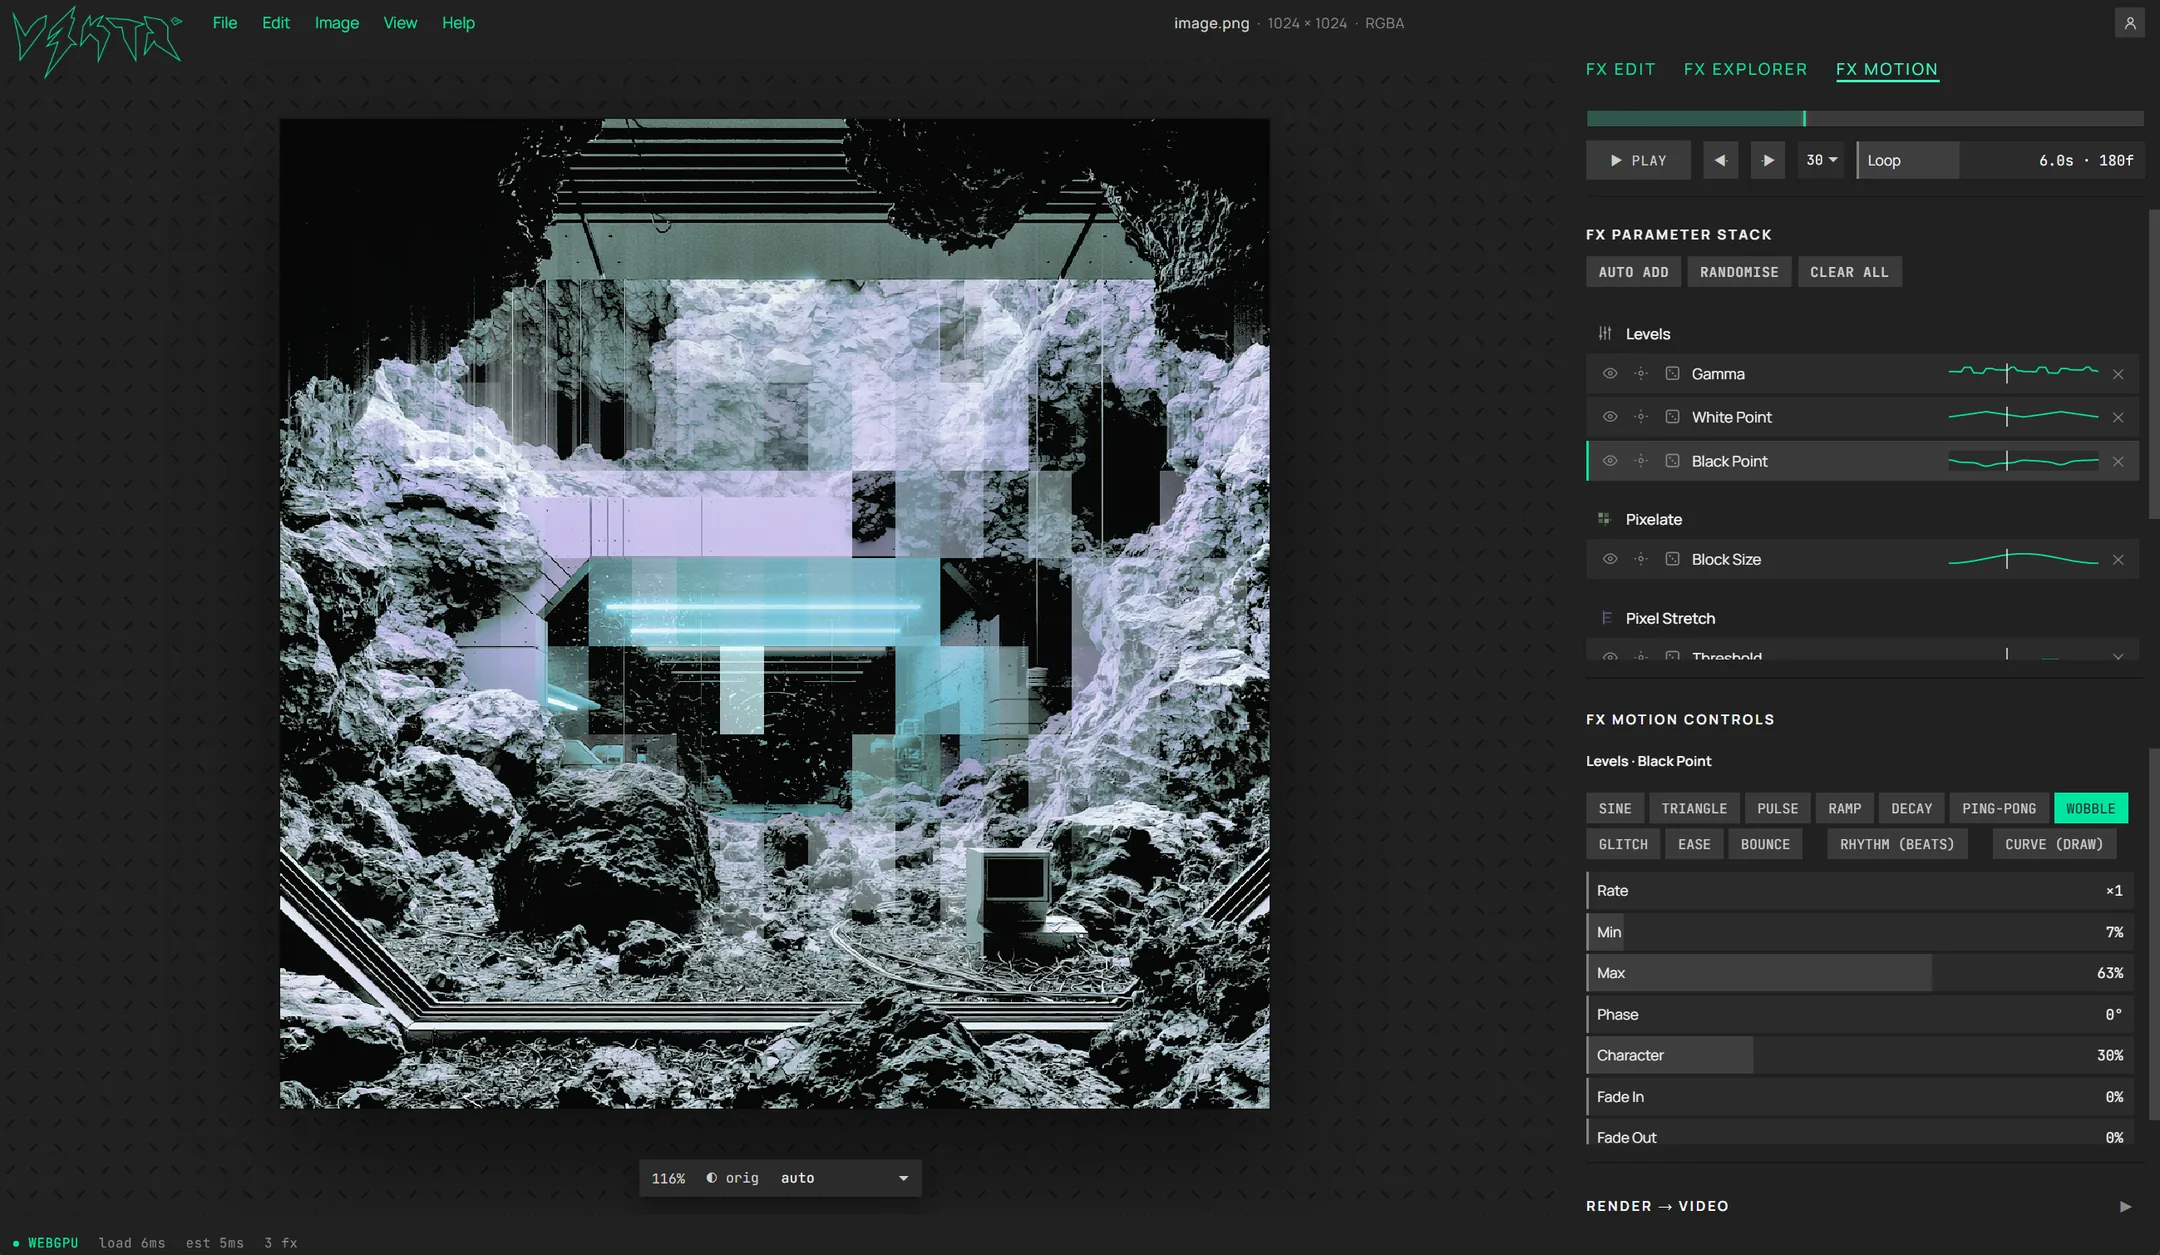
- FX Motion — animate. A loop transport, and a stack of the parameters you’ve armed.
They’re views of the same document, not modes you commit to. Switching costs nothing.
The five things worth knowing
A layer is one effect
Add an effect and you get a row in the FX Stack — with its own visibility toggle, blend mode, mix, and its own set of parameters. The same effect can appear twice with different settings. Nothing is global.
The stack runs bottom-up
The bottom layer sees the original image; each one above it sees the result of everything below. This is the single most non-obvious fact in the app — if an effect isn’t doing what you expect, the usual reason is what it’s sitting on top of, not the effect itself. Drag rows to reorder and the picture changes accordingly.
Any parameter can be animated
Every parameter has a small arm dot beside it. Arm it and that parameter appears in the Motion stack, where you decide how it moves. No effect animates itself and none of them hold a time control — an effect decides what happens to the picture, Motion decides when. Moves (Pan, Push In, Orbit, Sway, Handheld) are just shortcuts that arm a few parameters for you, so you can always see and edit what they did.
Any effect can be masked
A mask belongs to its layer, so you can limit one effect without touching the rest of the stack. Sources include radial, linear and gradient shapes, image luma, and — the one worth playing with — depth, which lets an effect apply only to what’s near the camera or only to what’s behind it.
The interface repeats itself
Sliders for single values, pads for anything with two (position, offset), dials for a direction plus an amount, dropdowns for modes. The chips above the rail filter it to one of the nine groups. A HEAVY tag means an effect is expensive to render — it will still run, it just costs you frames.
Motion, in practice
Masking one effect
If you don't know what you want yet
Most people don’t, and that’s what FX Explorer is for. Generate a stack, bias it toward the families you like, pull the recipe faders about until something lands, then take it into FX Edit and work on it properly. It’s the fastest way to find out what the library can do — 86 effects is more than anyone browses alphabetically.
The faster way in: Randomise and Wild
You don’t have to go through the Explorer to find things. Every effect’s Parameters panel carries three small buttons:
- Reset — all parameters back to defaults.
- Randomise — rolls that effect’s parameters.
- Wild — rolls the parameters and the blend mode, including Z-Depth, N-Depth and Erase.
Wild is the one worth knowing about. Because it rolls the blend mode too, it reaches looks that rolling parameters alone can’t — a depth-aware blend on an effect you’d never have thought to put it on. It’s exploration one layer at a time, where the Explorer rolls the whole stack.
Keyboard
The editor is keyboard-operable, and where it isn’t is written down: see the accessibility page.
Something here unclear, or the app not doing what this page says it does? Tell me — either the app is wrong or the page is, and both are worth knowing about.